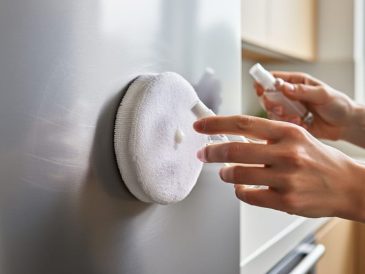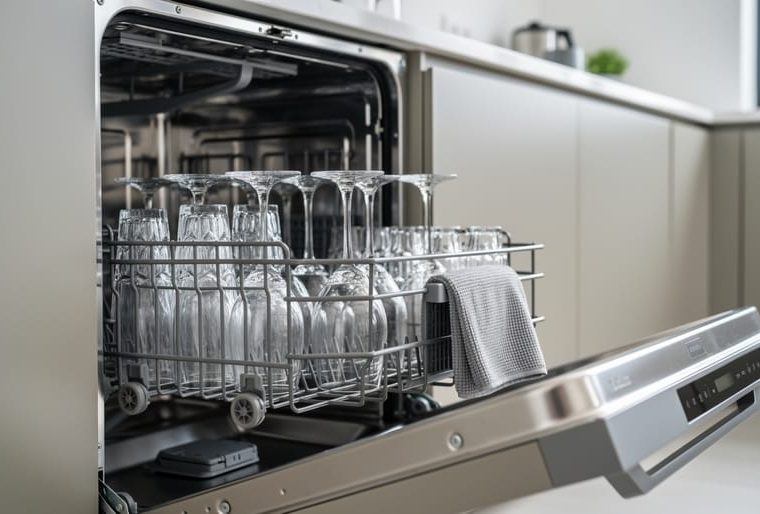
Keeping your dishwasher in peak condition requires five essential maintenance habits: running monthly cleaning cycles, checking and cleaning the filter every two weeks, inspecting spray arms for clogs, wiping down door seals, and using the right detergent amount. These simple practices take less than 20 minutes per month and can extend your appliance’s lifespan by years while ensuring sparkling clean dishes every cycle.
Your dishwasher is one of the hardest-working appliances in your home, processing hundreds of loads annually. Yet most homeowners overlook basic maintenance until something goes wrong. Food particles accumulate in hidden crevices, mineral deposits clog spray jets, and detergent residue builds up on door gaskets. The result? Cloudy glasses, lingering odors, and eventually costly repairs or premature replacement.
Modern home living demands appliances that work reliably behind the scenes, and today’s dishwashers are sophisticated machines designed for efficiency. Our international design team has consulted with appliance specialists and homeowners across three continents to identify the maintenance steps that matter most. At recent Pure Design community events, the most common question we heard was surprisingly specific: what actually prevents dishwasher problems before they start?
The answer lies in understanding how these machines function and addressing their vulnerabilities proactively. This guide delivers seven actionable care tips proven to prevent 90% of common dishwasher issues, organized from most critical to occasional maintenance tasks.
How We Selected These Care Tips
We built this list by consulting appliance technicians across Pure Design’s international team, who see the same preventable problems in service calls year after year. The tips reflect real issues discussed at our community design talks, where homeowners consistently ask about the same maintenance challenges. Our selection prioritizes practices that deliver maximum impact with minimal effort, fitting the time constraints of busy households while respecting the contemporary design aesthetic of modern kitchens.
Key Takeaway: These seven tips combine expert technical knowledge, real-world problem frequency, and practical ease of implementation. Every recommendation works across leading 2026 dishwasher models, from basic tasks like filter cleaning to nuanced decisions about adding salt to a dishwasher based on your water type.
Each tip addresses a specific failure point that our technicians encounter regularly, ensuring you focus your maintenance efforts where they matter most rather than following generic advice that may not apply to your appliance.
1. Clean the Filter Monthly to Prevent Performance Drop
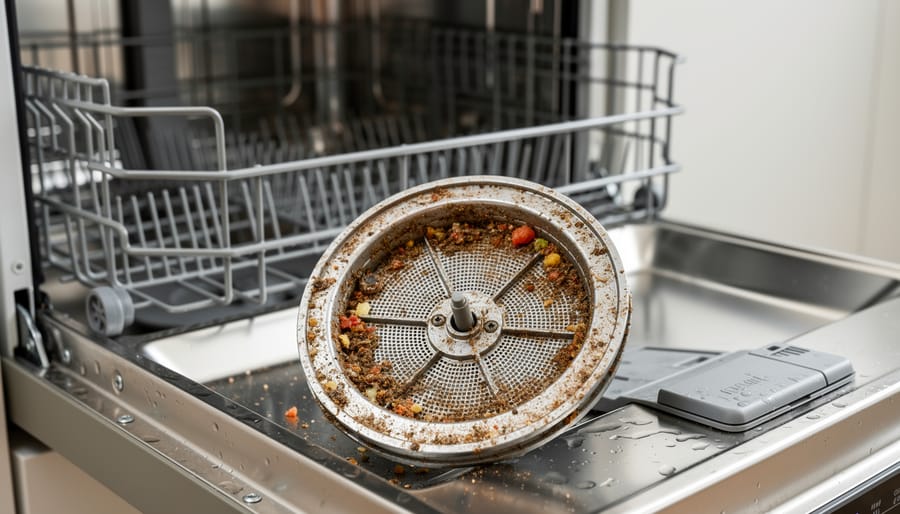
The filter is your dishwasher’s first line of defense against food debris, yet most homeowners never touch it. Hidden at the bottom of the tub beneath the spray arm, this cylindrical mesh component traps particles before they recirculate onto your dishes or clog the drain pump. When neglected, the filter becomes a sludge-filled breeding ground for bacteria and odors, while simultaneously choking water flow and cleaning power.
Modern dishwashers use self-cleaning filters far less frequently than older models. Most 2026 units rely on manual-clean filters that require your attention. Start by pulling out the bottom rack. You’ll see a cylindrical assembly, typically twist-and-lift or tab-release, at the tub’s center. Remove it gently. Don’t be surprised if what emerges looks like a science experiment gone wrong.
Rinse the filter under warm running water, using a soft brush or old toothbrush to dislodge trapped food particles from the mesh. Pay attention to the fine screen, where grease and tiny debris accumulate. For stubborn buildup, soak the filter in warm soapy water for ten minutes before scrubbing. Some manufacturers recommend a vinegar soak for mineral deposits.
Inspect the filter housing in the tub floor. Wipe away any debris pooled there. Reinstall the filter by reversing the removal process, ensuring it locks securely. A loose filter allows food particles to bypass filtration entirely.
This monthly ritual takes five minutes and prevents the gradual performance decline that makes homeowners question their dishwasher’s effectiveness long before its actual lifespan ends.
2. Wipe Door Seals Weekly to Avoid Mold and Leaks
The rubber gasket around your dishwasher door creates the waterproof seal that keeps your kitchen floor dry, but its accordion-like folds make it a magnet for trapped moisture and food debris. Left unchecked, this combination breeds mold, particularly black mold that stains the seal and releases musty odors into your kitchen.
A weekly wipe-down takes two minutes and prevents both hygiene issues and aesthetic problems. Pull the door open fully and run a damp microfiber cloth along the entire gasket perimeter, paying special attention to the bottom edge where water pools. Lift the rubber folds gently to clean underneath where grime hides.
For routine cleaning, warm water works fine. If you spot early mold formation, mix equal parts white vinegar and water, or use a mild dish soap solution. Avoid harsh chemicals or abrasive scrubbers that can degrade the rubber, leading to cracks and eventual leaks.
This simple habit preserves your seal’s integrity for years longer than neglected gaskets. In modern kitchens where the dishwasher integrates into sleek cabinetry, visible mold stains disrupt the clean lines you’ve worked to achieve. Beyond appearances, a compromised seal means water damage risk and costly repairs that weekly prevention easily avoids.
3. Run a Deep Clean Cycle with Vinegar or Commercial Cleaner Quarterly
A quarterly deep clean tackles the invisible buildup that monthly filter maintenance can’t reach. Even with regular use, minerals from hard water, grease residue from dishes, and detergent film accumulate inside the tub, around the heating element, and within spray arm channels. This hidden layer gradually reduces your dishwasher’s efficiency and creates the cloudy, spotted finish on glassware that frustrates homeowners in hard water regions.
You have two effective approaches: white vinegar or commercial dishwasher cleaners. The vinegar method costs practically nothing, place two cups of white vinegar in a dishwasher-safe bowl on the top rack and run a hot water cycle without dishes. The acid cuts through mineral deposits and grease while neutralizing odors. For a more aggressive clean, commercial cleaners like Affresh or Finish contain chelating agents specifically formulated to dissolve limescale and remove stubborn film. Follow package directions, typically running the product through an empty machine on the hottest cycle available.
Commercial cleaners work faster and target tougher buildup, while vinegar suits routine maintenance between deeper interventions. If you live in an area with very hard water, alternating methods quarterly, vinegar one cycle, commercial cleaner the next, provides comprehensive protection. This practice directly prevents the cloudy dish syndrome by stripping away the mineral film that settles on glassware during the rinse cycle, keeping your dishes as spotless as your modern kitchen deserves.
4. Check and Clear Spray Arm Holes to Maintain Water Pressure

Spray arm holes smaller than a pinhead can make the difference between sparkling dishes and a mediocre wash cycle. These tiny jets distribute pressurized water throughout the dishwasher, but mineral deposits from hard water and food particles routinely clog them, reducing the force and coverage of the spray pattern.
Pull out the lower and upper spray arms, most twist or clip off easily. Hold each arm up to the light and look through the holes. You will often see white calcium buildup or dark food residue blocking the openings. Use a toothpick, straightened paper clip, or thin wire to gently poke through each clogged hole, then rinse the arm under running water to flush out loosened debris.
This simple inspection takes five minutes every two months but prevents a cascade of problems. Blocked jets mean uneven water distribution, leaving some dishes untouched by the spray while others get hammered. The pump works harder to compensate, straining the motor. You will notice plates with dried-on food after a full cycle, cloudy glassware, or standing water in cups, all signs the spray arms are not performing at full capacity.
Clear jets restore proper pressure and coverage, ensuring every load comes out genuinely clean without rewashing.
5. Load Dishes Strategically to Extend Appliance Life
How you load your dishwasher directly affects how long it will last. Poor loading habits create unnecessary wear on racks, spray arms, and the wash motor, components that are expensive to replace and can shorten your appliance’s lifespan by years.
The most common mistake is blocking the spray arms, those rotating components at the bottom and top of your machine. When tall pots, overhanging utensils, or improperly angled plates obstruct their rotation, the motor works harder to compensate, and water distribution suffers. Before starting any cycle, spin the spray arms manually to confirm nothing impedes their movement. Our appliance technicians from the Pure Design international team consistently report blocked spray arms as a leading cause of premature motor failure in modern dishwashers.
Overloading forces the machine to work against resistance, straining the motor and preventing proper water circulation. Dishes packed too tightly trap food particles that should rinse away, requiring rewashes that add wear cycles. Leave space between items for water and air to flow freely.
Here are essential loading practices that protect your investment:
- Place large items along the sides and back, never in the center where they block the spray tower
- Angle bowls and cups downward so water drains rather than pools
- Load utensils with handles down for better cleaning, except sharp knives which should point down for safety
- Avoid nesting items inside each other, which traps debris and prevents cleaning
- Distribute weight evenly to prevent rack warping over time
Proper loading also protects your racks themselves. Avoid forcing items into spaces, which bends tines and damages the coating that prevents rust. Once that protective layer chips, corrosion spreads quickly. Think of strategic loading as part of your kitchen’s functional design, efficiency that preserves both performance and aesthetics.
6. Inspect and Maintain the Door Latch Mechanism
The door latch mechanism rarely gets attention until it fails, yet it plays a critical role in your dishwasher’s operation and your kitchen’s safety. A faulty latch can interrupt wash cycles mid-program, allow water to leak onto your floors, or prevent the machine from starting altogether, all issues that disrupt your modern home upkeep routine.
Start by testing the door closure. It should click firmly shut with gentle pressure, not require forcing or multiple attempts. Open the door fully and examine the hinges for visible looseness or play. Tighten any accessible screws you find along the hinge mechanism using a screwdriver, this simple adjustment often resolves doors that won’t stay latched.
Next, inspect the door catch itself, typically a plastic or metal hook on the door that engages with the strike plate on the machine body. Look for cracks, wear, or misalignment. If the catch appears worn but the door still closes, you have time to order a replacement part before complete failure occurs. Many 2026 models use standardized catches available through appliance parts suppliers.
Check the strike plate for bent metal or accumulated debris that might prevent proper engagement. A quick cleaning with a damp cloth can restore function. If the latch feels loose or the door doesn’t seal tightly against the gasket, the internal spring mechanism may need adjustment, consult your manual for model-specific guidance, as mechanisms vary significantly across brands.
7. Use the Right Detergent and Rinse Aid for Your Water Type

Your dishwasher’s performance hinges on matching products to your water chemistry. Hard water, common in many regions, contains high mineral levels that interact with detergent differently than soft water does. Using the wrong formulation creates cloudy film on glassware, chalky residue on dishes, and limescale buildup inside the machine that eventually clogs spray arms and coats heating elements.
Start by testing your water hardness. Inexpensive test strips from hardware stores give you a number in grains per gallon or parts per million. Below 3.5 gpg qualifies as soft water; above 10.5 gpg is very hard. Modern dishwashers with automatic detergent dispensers and soil sensors calibrate wash cycles based on expected water conditions, so feeding them the right product matters for optimal operation.
For hard water, choose detergents with built-in water softeners and higher alkaline content. Powder and gel formulations often handle minerals better than pods in very hard water. Rinse aid becomes essential rather than optional, it prevents spotting by helping water sheet off dishes instead of beading up and leaving mineral deposits as it evaporates.
Soft water requires less detergent overall. Too much product in soft water leaves soapy residue and can actually etch glassware over time, creating permanent cloudiness you cannot remove scratches from. Start with half the recommended dose and adjust based on results.
Eco-friendly tablets and plant-based detergents have improved dramatically by 2026. Look for phosphate-free options with biodegradable surfactants, they clean effectively while reducing environmental impact without sacrificing the finish on your dishes or the longevity of your appliance’s interior components.
Common Dishwasher Care Questions
How often should I run an empty dishwasher cycle?
Run an empty hot cycle with a cleaner or vinegar every three months as part of your deep cleaning routine. There’s no benefit to running it empty more frequently, regular use with proper loading actually helps the machine self-clean between maintenance cycles.
Can I use regular dish soap in my dishwasher if I’m out of detergent?
Never use dish soap in a dishwasher, it creates excessive suds that can overflow, damage electronic components, and leave residue throughout the machine. If you’re caught without detergent, hand-wash dishes or wait until you can get proper dishwasher detergent.
What causes that cloudy white film on my glassware?
White film is typically hard water mineral deposits or detergent residue buildup. Increase your rinse aid amount, ensure you’re using the right detergent for your water hardness, and run a vinegar deep clean cycle to remove existing film.
When should I call a professional instead of handling repairs myself?
Call a technician if you notice persistent leaking, the machine won’t start despite checking power connections, you hear grinding or unusual motor sounds, or the control panel displays error codes. These issues typically require specialized tools and replacement parts beyond routine homeowner maintenance.
Beyond these common concerns, our international design team regularly hears questions about integrating maintenance into busy schedules. The reality is that these care tasks work best when built into your existing kitchen routines, filter cleaning after your monthly deep kitchen clean, seal wiping as part of weekend tidying, and quarterly treatments scheduled with other seasonal home maintenance. This approach transforms dishwasher care from a forgotten chore into a seamless part of maintaining your modern kitchen’s efficiency and aesthetic appeal.
These seven care practices add up to less than an hour of maintenance per month, yet they can extend your dishwasher’s lifespan by years. Most tasks take just minutes, wiping seals, checking spray arms, loading strategically, and become second nature once you establish the rhythm. Monthly filter cleaning and quarterly deep cleans complete the routine, protecting your investment while keeping your kitchen running smoothly.
In modern home design, appliance care isn’t separate from aesthetic upkeep. It’s part of maintaining the seamless functionality that makes contemporary kitchens work beautifully. A well-maintained dishwasher doesn’t just clean better; it preserves the clean lines and efficient workflow that define today’s kitchen spaces.
Our international team at Pure Design regularly shares maintenance insights drawn from diverse home environments, from hard-water challenges in certain regions to climate-specific care considerations. We’ve seen firsthand how these simple practices prevent the frustrating breakdowns that disrupt daily life. If you found these tips valuable, join us at our upcoming community design events where we explore practical solutions for keeping modern homes functioning at their best. Small, consistent care creates lasting results, for both your appliances and your peace of mind.