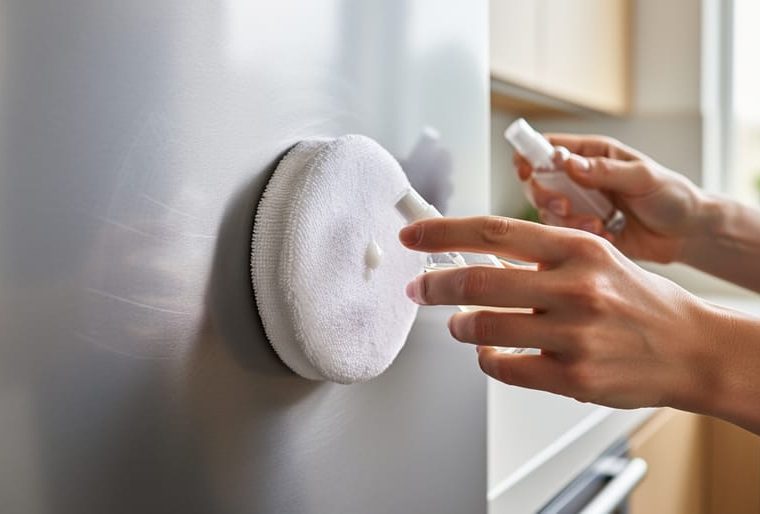
You can restore the pristine look of scratched surfaces throughout your home using the right technique matched to each material. Whether it’s a marble countertop marred by kitchen tools, hardwood flooring scuffed by furniture, or stainless steel appliances dulled by daily use, most surface scratches respond to one of three fundamental approaches: filling, buffing, or refinishing. The key is understanding your surface type and scratch depth before you begin.
Scratches undermine the design integrity you’ve worked hard to create. Our international team of designers consistently observes that even minor surface damage draws the eye and diminishes a room’s overall aesthetic. The good news? Most homeowners can successfully maintain beautiful surfaces themselves with proper guidance and patience.
Success hinges on two critical factors: accurate surface identification and realistic assessment of the damage. Shallow scratches that haven’t penetrated beyond the finish layer typically respond to gentle buffing compounds and polishing techniques. Deeper gouges that reach the substrate material require filling products or professional refinishing. The wrong approach can worsen the problem, turning a manageable scratch into a larger repair job.
This guide walks you through the complete process, from gathering the proper materials to verifying your results. We’ll cover testing protocols that prevent accidental damage, step-by-step techniques organized by repair method, and surface-specific considerations for everything from glass to luxury vinyl. You’ll gain the confidence to tackle common scratch repairs using products like cutting compound while knowing when to call in expert help.
Understanding Surface Types and Scratch Depth
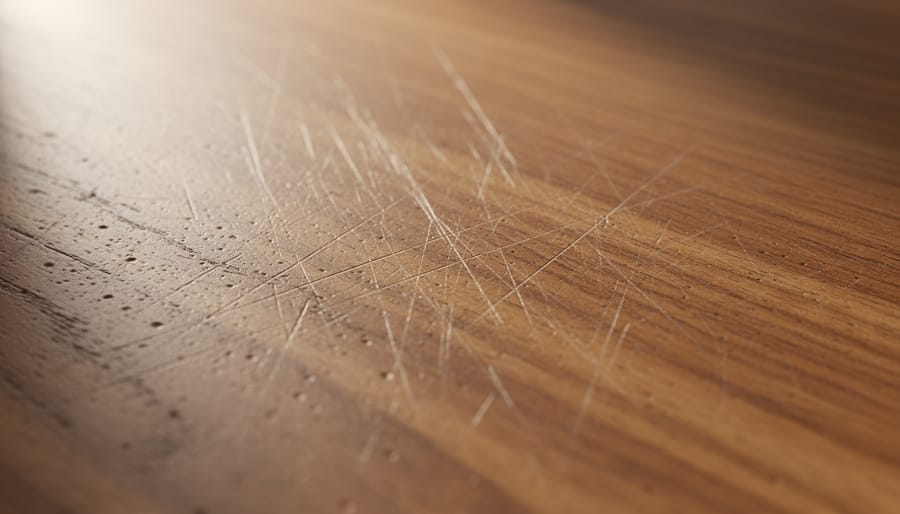
Before you choose the right materials for your home, it’s worth understanding how they respond to scratches. Each surface has unique characteristics that determine both how easily it scratches and how successfully you can repair the damage.
Wood surfaces, whether hardwood floors or furniture, scratch relatively easily but often respond well to repair. The key distinction is finish depth, scratches that stay within the protective finish layer are far easier to address than those cutting into the wood itself. Laminate mimics wood but consists of a photographic layer beneath clear resin, meaning deep scratches expose the pattern underneath and can’t be sanded out like genuine wood.
Stone surfaces like marble, granite, and quartz vary widely in hardness. Marble scratches more readily than granite, while engineered quartz sits somewhere between. Metal surfaces, stainless steel appliances, brass fixtures, aluminum trim, typically show scratches as directional marks that disrupt the brushed or polished finish. Glass and acrylic both scratch, but glass requires specialized polishing compounds while acrylic responds to gentler treatments.
Scratch depth matters as much as surface type. Surface scratches affect only the topmost layer and catch light but not your fingernail. Light scratches create a visible groove you can feel with a fingernail but don’t penetrate deeply. Deep scratches catch your nail noticeably and may expose substrate material, these approach DIY scratch removal limits and sometimes require professional intervention.
This depth assessment determines everything that follows: the compound you select, the pad you pair it with, and the pressure and time you invest in the repair process.
Tools and Materials You’ll Need
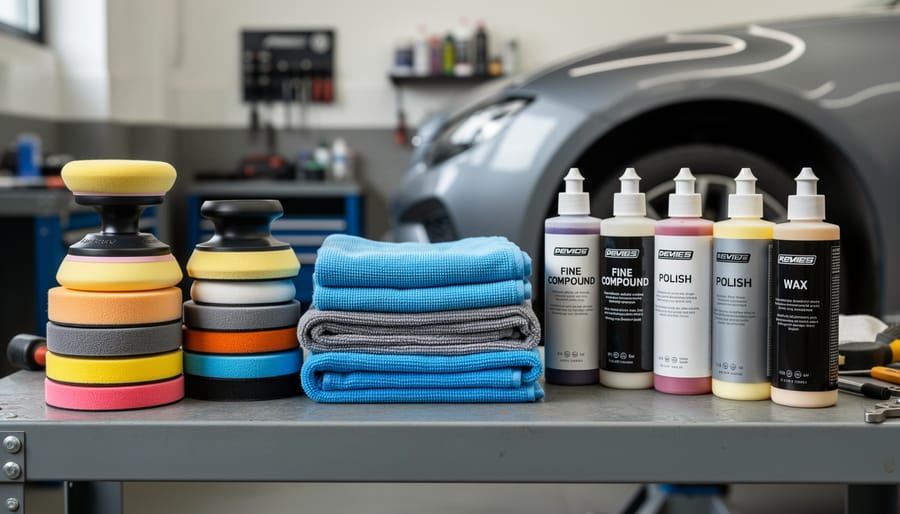
The materials needed for scratch removal vary by surface and severity, but having the right inventory before you start saves frustration and multiple trips to the store. Our international design team shares a perspective that often surprises newcomers: the compound matters less than the technique, yet starting with appropriate materials builds confidence and prevents surface damage.
Compounds form the foundation of scratch removal. Polishing compounds contain fine abrasives that smooth minor surface scratches through gentle cutting action, think of them as refinishing agents that restore clarity to glass, metal, and sealed surfaces. Rubbing compounds are more aggressive, designed for deeper scratches that need material removal before polishing can take effect. Use these sparingly and only when gentler methods fail. Paste wax serves double duty: it fills fine scratches in wood while providing protection, making it the first choice for furniture and hardwood floors. Specialized fillers, wood putty, epoxy sticks, or acrylic repair kits, tackle deeper gouges that compounds alone can’t address. Our team members in markets with limited product access report success with automotive polishing compounds as versatile alternatives to surface-specific formulations.
Pads and applicators deliver compounds to surfaces with varying levels of aggression. Microfiber cloths work for most light polishing tasks and final buffing, keep several on hand since you’ll need fresh ones throughout the process. Foam applicator pads distribute compound evenly and conform to contours. Buffing pads, whether wool or synthetic, attach to power tools for larger areas. Fine steel wool (0000 grade only) handles delicate tasks on wood and metal but should never touch glass or soft plastics.
- Wood surfaces: paste wax, furniture markers, microfiber cloths, fine steel wool
- Glass and acrylic: cerium oxide or specialized glass polish, foam pads, lint-free cloths
- Metal: metal polish or rubbing compound, buffing pads, microfiber cloths
- Stone: polishing powder specific to stone type, felt pads, water spray bottle
- All surfaces: cleaning solution, masking tape, gloves, good lighting
Optional tools elevate results but aren’t mandatory. An orbital buffer speeds work on large areas like countertops or floors, though hand application gives you better control for learning. Masking tape protects adjacent surfaces during aggressive treatments. Proper cleaning supplies, isopropyl alcohol for glass and metal, wood cleaner for furniture, ensure compounds work on debris-free surfaces rather than grinding dirt into scratches.
Safety Warnings and Precautions
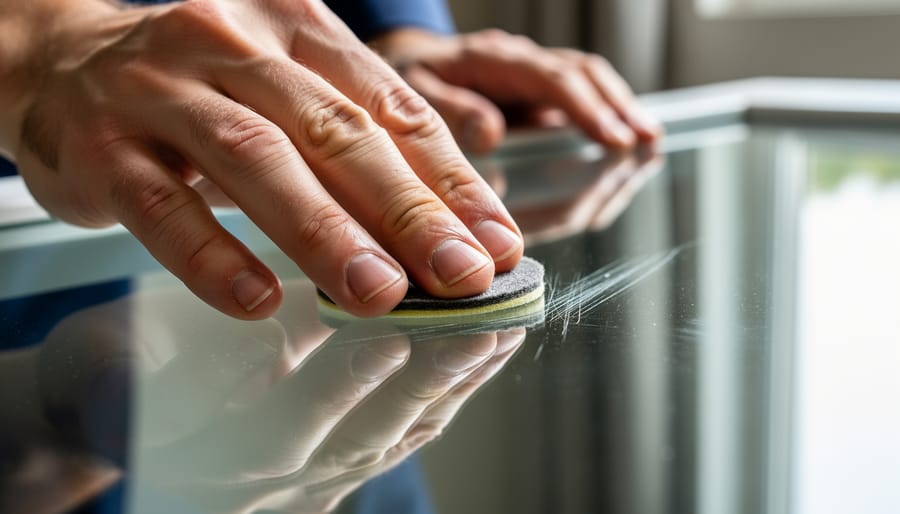
Before you begin working on any scratched surface, understanding the safety considerations and limitations of DIY scratch removal can save you from costly mistakes or health risks. Some compounds contain volatile organic compounds (VOCs) that require adequate ventilation, always open windows and use fans to create cross-ventilation, especially when working with rubbing compounds, lacquer-based fillers, or solvent-based polishes. If you notice headache, dizziness, or strong chemical odor, stop immediately and move to fresh air.
Wear nitrile gloves to protect your skin from chemical irritation, and safety glasses if you’re using an electric buffer or working overhead, as compound particles can splash. Keep compounds away from your eyes and mouth, and wash your hands thoroughly after handling any product, even those marketed as “natural” or “non-toxic.”
Certain surfaces should never be treated with DIY methods: antique furniture with original finishes, museum-quality pieces, surfaces with hand-applied or specialty finishes (French polish, conversion varnish, catalyzed lacquer), and anything of significant monetary or sentimental value. If a scratch penetrates through a finish layer into raw wood or substrate, or if it’s deeper than you can catch with your fingernail, home remedies may worsen the damage by creating uneven depth or cloudiness around the repair.
Stop and consult a professional restoration specialist if you see any of these signs after testing: finish softening or dissolving, color change or yellowing, hazing that doesn’t clear, or the scratch appearing deeper after initial treatment. Your instinct to preserve a cherished surface is correct, sometimes that means recognizing when expertise beyond home methods is needed.
Step-by-Step Scratch Removal Process
Step 1: Clean and Assess the Surface
Start by removing any surface contaminants that could interfere with your repair or cause further damage. Use a gentle, pH-neutral cleaner appropriate for your surface, dish soap and water for most materials, specialized stone cleaner for marble or granite, glass cleaner for windows. Wipe the scratched area with a clean microfiber cloth, working outward from the scratch to avoid dragging debris across it.
Once clean and dry, examine the scratch under good lighting. Run your fingernail gently across it. If your nail catches, you’re dealing with a deeper scratch that may require rubbing compound or filler. If you feel it but your nail doesn’t catch, a polishing compound will likely suffice. Scratches you can only see but not feel are surface-level and respond well to gentle polishing.
Identify your surface material with certainty. Wood finishes behave differently than the wood beneath. Laminate mimics wood but requires entirely different treatment. Coated glass needs gentler handling than bare glass. This assessment determines everything that follows, the wrong compound on the wrong surface creates new problems rather than solving the original one.
Step 2: Choose Your Compound and Pad Combination
The decision you make at this stage determines whether your repair succeeds or creates more damage. Surface material comes first, what works brilliantly on glass can ruin wood, and compounds formulated for metal will leave residue on stone that’s nearly impossible to remove.
For wood surfaces with light scratches, start with paste wax applied with a soft cloth. The wax fills minor imperfections and restores sheen without abrading the finish. Deeper scratches in wood require furniture markers or wax sticks that match your wood tone, followed by gentle buffing with microfiber once the filler sets. Never use abrasive compounds on finished wood; you’ll remove the protective coating.
Glass scratches respond to cerium oxide powder mixed with water to form a paste, applied with a felt pad in circular motions. For stubborn glass scratches, diamond polishing paste at 3 micron grit works effectively, though it requires more time and patience. Use firm pressure with a microfiber applicator.
Metal surfaces need metal polish specific to the type, stainless steel, brass, chrome each have formulated compounds. Pair with a foam buffing pad for even application. Stone countertops call for polishing powder designed for the specific stone type, marble, granite, quartz all differ, applied with a damp cloth using light pressure.
Synthetic surfaces like laminate or acrylic respond best to automotive plastic polish with a soft foam pad, which fills scratches without melting the material.
Step 3: Prepare the Work Area
Before you apply compound to the scratched surface, set yourself up for success. Use painter’s tape to mask off the area surrounding the scratch, a border about two inches wider than your planned work zone protects adjacent surfaces from accidental compound transfer and gives you clear boundaries. Position a bright, adjustable light source so it shines across the scratch at an angle; this side lighting reveals the scratch depth and helps you monitor your progress as you work.
Lay out everything you’ll need within arm’s reach: your chosen compound, clean pads in progression from working to buffing, extra microfiber cloths, and cleaning solution for the final wipe-down. Clear the immediate area of clutter so you can move freely and work at a comfortable height. If you’re treating a vertical surface like a wall or cabinet door, consider whether you can safely remove and work on it horizontally, you’ll have better control and avoid drips.
Check that your workspace has adequate ventilation, especially if you’re using solvent-based compounds. Open windows or position a fan to create cross-flow without blowing dust onto your work surface. This preparation takes five minutes but prevents interruptions once you start the delicate process of removing the scratch.
Step 4: Apply Compound with Proper Technique
The way you apply compound matters as much as which product you choose. A conservative, controlled approach prevents additional damage and produces the most natural-looking results. Here’s how to execute the technique properly:
- Start with a pea-sized amount of compound, less than you think you need. You can always add more, but excess product creates mess and uneven application that’s difficult to correct.
- Match your motion to the surface material: use straight, grain-following strokes for wood; gentle circular motions for glass and metal; light linear passes for stone and laminate. Never scrub against wood grain or use aggressive circles on directional finishes.
- Apply pressure equivalent to a firm handshake, enough to work the compound into the scratch, but not enough to flex the surface or fatigue your hand quickly. If you’re pressing hard, you’re pressing too hard.
- Work the compound for 30 to 60 seconds in one area before assessing. Rushing through in 10 seconds won’t give the abrasives time to work; grinding away for five minutes risks creating new problems.
- Build results gradually through multiple light passes rather than one aggressive session. If the scratch isn’t gone after the first application, clean the area, reassess, and repeat with fresh compound.
Our international design community consistently emphasizes patience as the most undervalued technique. A furniture restorer from Copenhagen shared at a recent Pure Design event that the difference between amateur and professional results often comes down to working in calm, measured intervals rather than attacking the problem. Let the compound do its job while you maintain steady, controlled motion. If your arm tires or you feel frustrated, stop and return later. The scratch will still be there, but your patience will produce a finish you can be proud of.
Step 5: Buff and Blend
After working the compound into the scratch, it’s time to refine the repair and make it disappear into the surrounding surface. This buffing stage is where patience truly pays off.
Switch to a clean, soft microfiber cloth or a fresh foam pad, continuing with your compound-laden applicator will only redistribute abrasive particles instead of polishing. For wood and metal, a gentle circular motion works well. On glass or stone, try straight overlapping passes that extend beyond the repair zone by several inches.
The key is feathering: don’t stop buffing exactly where the scratch ends. Gradually reduce pressure as you work outward, creating a transition zone that blends the treated area seamlessly with the untouched surface. Think of it as painting without visible brush strokes.
Check your progress frequently by wiping the area clean and viewing it from different angles. The finish should look uniform under direct light, no halos, dull spots, or texture changes that announce “repair done here.”
If you notice inconsistency, continue buffing with light pressure. The surface will gradually harmonize as you blend the microscopic texture across a wider area.
Step 6: Clean and Protect
Once you’re satisfied with the buffing, wipe away all compound residue with a clean, damp microfiber cloth. Follow with a dry cloth to prevent water spots. For wood, apply paste wax or furniture polish. Glass and metal benefit from a streak-free cleaner. Stone surfaces should get a pH-neutral sealer appropriate to the material. This protective layer locks in your repair work and guards against future scratches.
Verification and Quality Check
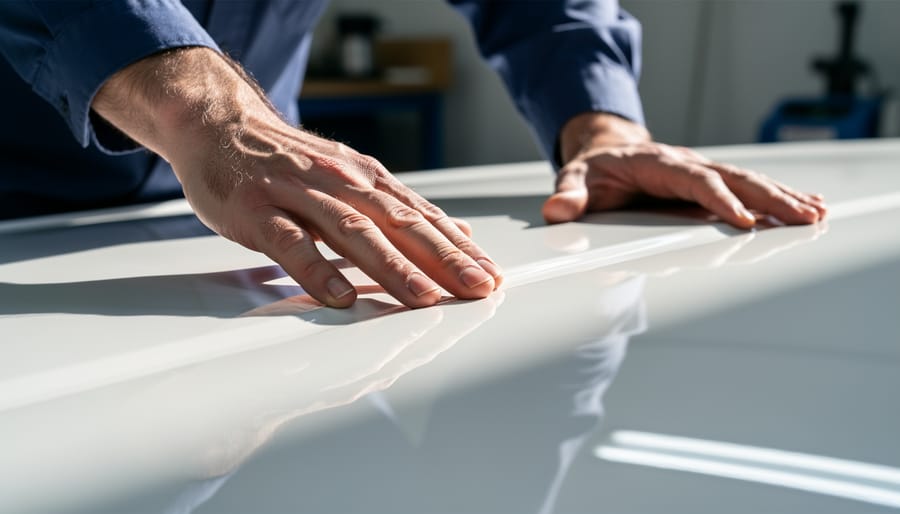
After completing the buffing and cleaning process, step back and give your work a thorough assessment before celebrating success. Proper verification ensures you’ve achieved the best possible result and helps you decide whether additional work is needed.
Start by examining the treated area under different lighting conditions. Natural daylight reveals details that artificial light might miss, so check the surface near a window if possible. Then evaluate under your home’s typical lighting, the way you’ll see it daily. Move around the surface, viewing it from multiple angles. Scratches that appear invisible head-on sometimes catch light when viewed from the side.
Run your fingertips lightly across the repair in both directions. A successfully treated scratch should feel smooth, with no catch or ridge. If you detect unevenness, the scratch likely needs another round of treatment or a finer compound.
Compare the repaired section to the surrounding area. The finish should blend seamlessly without noticeable color variation or sheen differences. A slight halo effect around the repair area usually means you need to feather your work further into the surrounding surface.
Be realistic about outcomes. Surface scratches and light marks can often be eliminated completely. Deeper scratches may be significantly improved but remain faintly visible under certain lighting, this is still a successful repair. If a scratch feels deep when you run your nail across it, or if the surrounding material has deformed, professional restoration is likely needed. Accept that some damage exceeds DIY repair capability, and knowing when to stop prevents making things worse.
Surface-Specific Tips from Our Design Community
Our international design community, from restoration specialists in Milan to DIY enthusiasts in Melbourne, has shared invaluable surface-specific wisdom through Pure Design events and platform discussions. These insights reflect years of collective experience maintaining the surfaces that matter most in real homes.
Hardwood floors demand different care than furniture, even when both are wood. Floors endure constant foot traffic and require more durable repairs; our Scandinavian members recommend going slightly darker with filler sticks on floors to account for dirt accumulation in the grain, whereas furniture benefits from exact color matching since scratches remain more visible at eye level. The directional grain matters more on furniture, always follow it during buffing, while floors can tolerate gentle circular motions because you’re viewing from above.
Glass shower doors accumulate soap residue that interferes with polishing compounds. A Tokyo-based designer shared her technique of using white vinegar first to strip buildup before applying cerium oxide, which drastically improved her success rate. Window glass, being cleaner and more accessible, responds faster to the same compounds with less prep work.
- Stainless steel appliances: Work with the grain direction, never against it; fingerprint-resistant finishes may not accept polish
- Marble countertops: Test acidity of any compound on the underside edge first; some polishes etch rather than repair
- Laminate surfaces: Stop at cleaning and wax, abrasive compounds remove the protective layer permanently
- Acrylic bathtubs and sinks: Use automotive plastic polish, not glass compound; pressure matters more than product
A recurring theme from our Berlin community event centered on lighting angle. What appears repaired under overhead kitchen lights may show residual haze in morning sunlight through a window. Our community recommends the “walk-away test”, step back ten feet and evaluate the repair from where you’d naturally view that surface daily, not from inspection distance.
Common Questions About Scratch Removal
Can toothpaste really remove scratches?
Toothpaste can work on very minor surface scratches in glass or acrylic because it contains mild abrasives, but it’s far less effective than proper polishing compounds and can leave a hazy residue. For any scratch you can feel with your fingernail, use purpose-made compounds instead.
How do you know if a scratch is too deep for DIY repair?
If your fingernail catches in the scratch when you run it across the surface, it’s likely too deep for polishing compounds alone and may require filler or professional restoration. On wood, scratches that expose bare wood beneath the finish need more than surface polishing.
Will the repair be visible after I’m done?
A properly executed repair using the right compound and technique should be nearly invisible, though viewing angle and lighting may reveal slight differences. The key is feathering the edges and matching the surrounding surface’s sheen through careful buffing.
What’s the difference between rubbing and polishing compound?
Rubbing compound contains coarser abrasives for removing deeper scratches and works more aggressively, while polishing compound uses finer abrasives to refine the surface and restore shine after rubbing compound or for treating lighter scratches. Think of rubbing as the correction step and polishing as the finishing step.
When deciding between an electric buffer and hand application, let the surface area and your comfort level guide you. Hand application gives you precise control and works perfectly for small repairs on furniture, countertops, and localized scratches where you need to feel the surface response. Electric buffers speed up work on larger areas like glass tabletops or extensive floor sections, but they demand practice to avoid creating new damage through excess heat or uneven pressure. For delicate surfaces or your first attempt at scratch removal, hands beat machines every time.
The longevity of your repair depends entirely on the surface type and how you maintain it afterward. A well-executed scratch removal on glass or metal can last indefinitely because you’ve physically reshaped the surface. Wood repairs protected with proper finish can endure for years, though high-traffic areas may show wear sooner. Applying appropriate sealants and following good bathroom surface care practices extends any repair’s lifespan and prevents new scratches from forming in the same vulnerable spots.
Restoring a scratched surface isn’t just about cosmetics, it’s about honoring the care you put into selecting and maintaining the spaces that matter to you. Every time you successfully remove or minimize a scratch, you’re preserving the investment you made in creating a beautiful home.
The process you’ve learned here comes down to a simple principle: match your compound, pad, and technique to your specific surface and scratch severity. Start conservative with the gentlest method that makes sense for your situation. A paste wax might be all you need for that dining table scratch; aggressive buffing compounds should be your last resort, not your first move. Build your confidence through small repairs, test relentlessly, and remember that patience delivers better results than force.
As you gain experience, you’ll develop an intuition for what works. You’ll know when to protect wood finishes proactively rather than repair them reactively, and you’ll recognize the moment a scratch demands professional expertise.
We’d love to hear how these techniques work in your home. Share your experiences at Pure Design community events or connect with fellow design enthusiasts who understand that maintaining beautiful spaces is an ongoing practice worth mastering.